Start closing more deals
No credit card required

Looking for a complete Sales Department Set-Up checklist that will help you to enhance your sales team and take customer service to the next level? Look no further.
This checklist will help you to launch a sales department quickly and efficiently.
This checklist will help you to launch a sales department quickly and efficiently.
How to use this Sales department set up checklist:
We’ve broken this checklist down into sections that cover the main focus areas of work in Selmo:
- 1
- 2
- 3
- 4
- 5
- 6
- 7
- 8
- 9
- 10
- 11
- 12
- 13
You’ll need to focus on all of the above for a holistic sales process.
The following points are very much housekeeping tasks but form the basics of implementing a successful, efficient sales department.
The following points are very much housekeeping tasks but form the basics of implementing a successful, efficient sales department.
Sign up / sign in
- Firstly, register at selmo-pro.com via the Sign Up button or just log in via the Sign In button.
- Sign up and double-check if the phone number is correct because you will need to confirm it.
- Go to the Settings section and fill your profile with additional information (optional).

Step 1
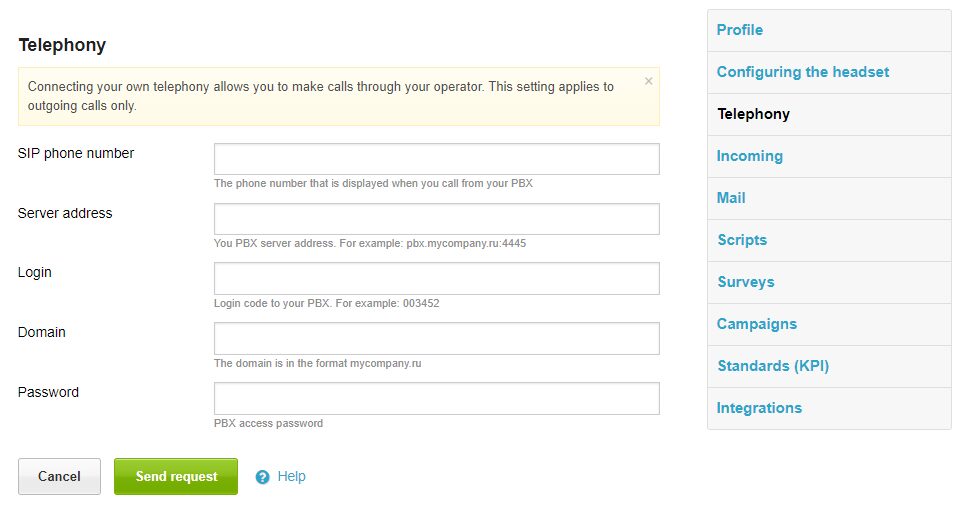
Telephony set up
- Firstly, you need to confirm your phone number on the “Telephony” page in the Settings section.
- You can work with telephony in two ways:
- use your own phone number
- connect your PBX service
Step 2
- We have two options for using phone numbers - you can use а general phone number for all users or a personal phone number for each user. For the sales department better to use а general number, because it will be displayed to all clients.
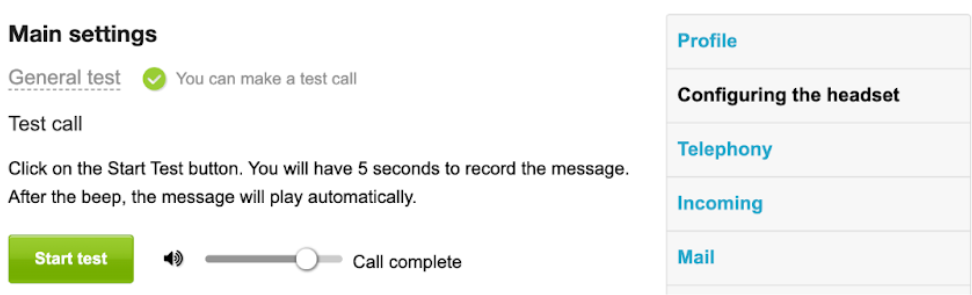
Test calls
- At this step, you need to choose the call mode. Please, select WebRTC mode and start to test your headset. With the help of the Echo service, we will check your headset work.
- Click on the “Start test” button and follow the instructions.
Step 3
- You need to say a phrase, and that will be played back in a few seconds. If you hear your voice, then everything works correctly. If you can’t proceed with the test by yourself, please ask our technical support team for help.
- Here you can check the recommendations about the best headset to use.
- After a successful headset configuration recommended to make a few test calls. You can make the test call to our customer service - you will be able to test the service together with our specialists.
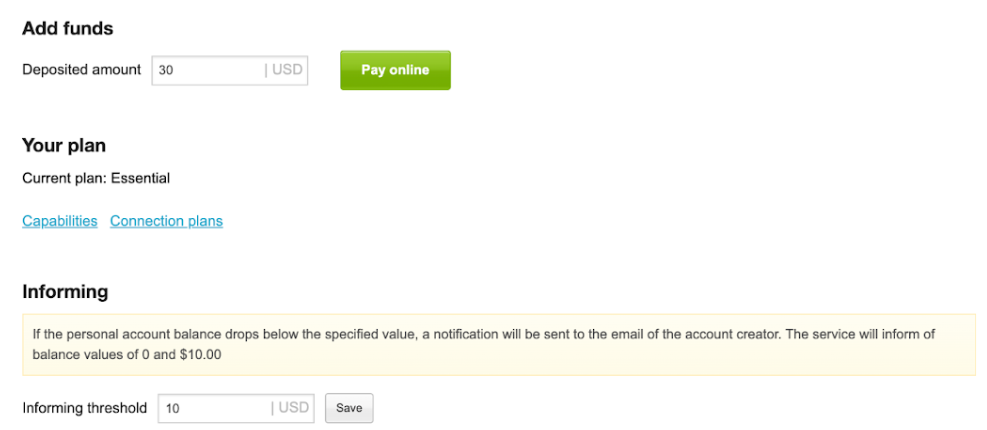
Balance top-up
- Balance top-up is carried out through the personal account in the Balance section.
- You can top up your balance online with the acquiring service or download the PDF with billing information.
- Add notifications - we will kindly notify you, then your balance will reduce.
Step 4
Calling
Go to the Calling tab. Click the «Add» button and select the entity to add:
Organization or Contact.
Fill in the fields of the selected entity in the window that opens and click on «Save».
Organization or Contact.
Fill in the fields of the selected entity in the window that opens and click on «Save».
Step 5
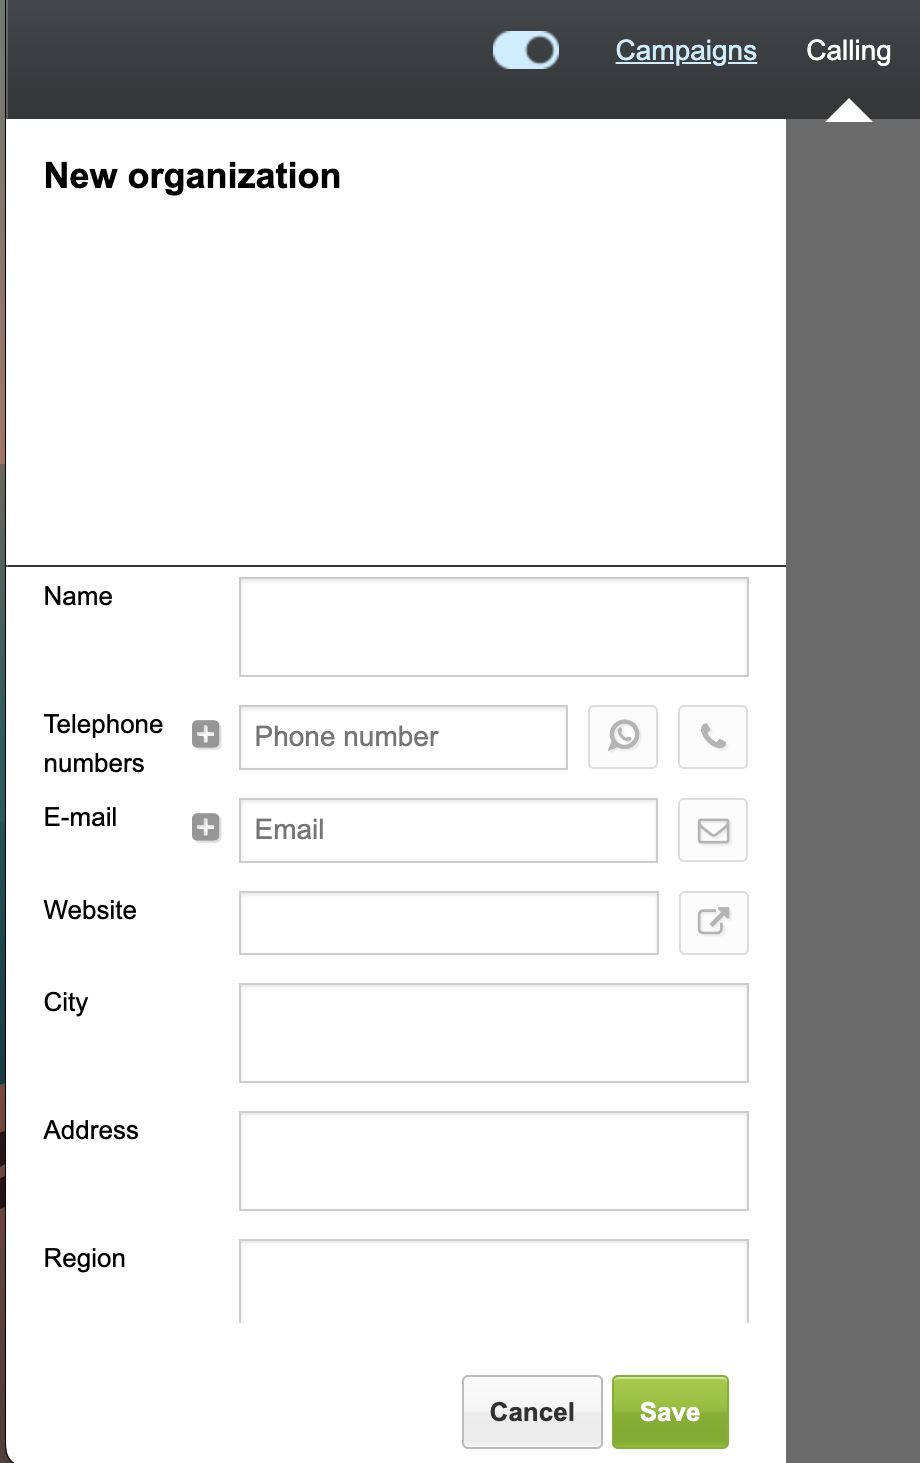
Organization Creation Card
You can find the added entities on the last page of the Calling tab.
You can filter contacts on the «Calling» page by the client's current time, by the latest call results (for processed contacts), or by tags. In the first case, you need to check the «Client Time» filter and specify the desired interval. The filter is used when working with clients in different time zones to exclude the possibility of calling at an inconvenient time (too late or too early).
Next, select the scenario, the period for which the calls were made and the end status of the last call. All contacts will be displayed with the corresponding option to end the call.
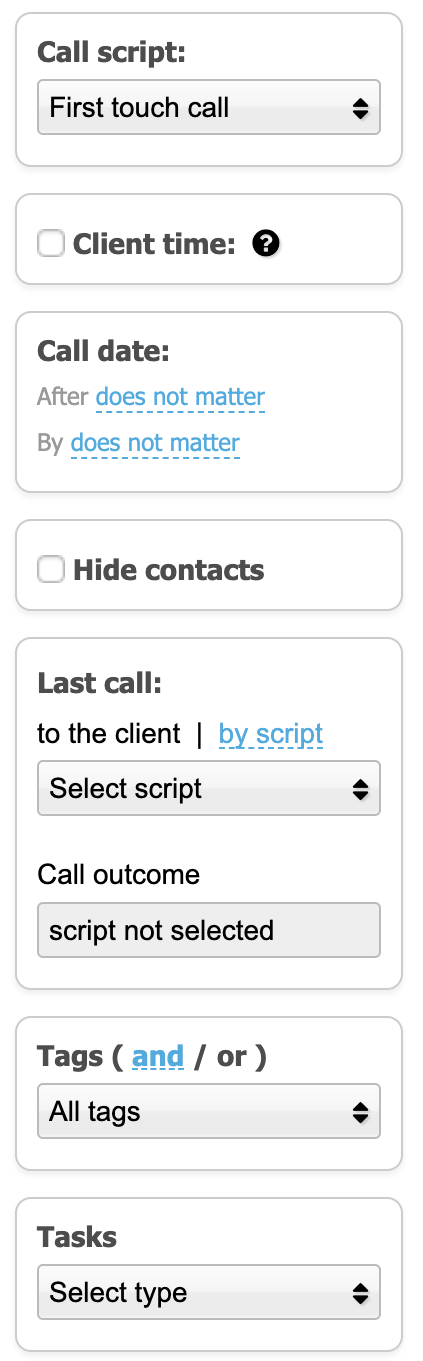
Here you can also filter contacts by the value «called» (contact that received 1 or more calls). Check the box and only those contacts who have not yet been called will remain on the «Calling» page.
Campaign
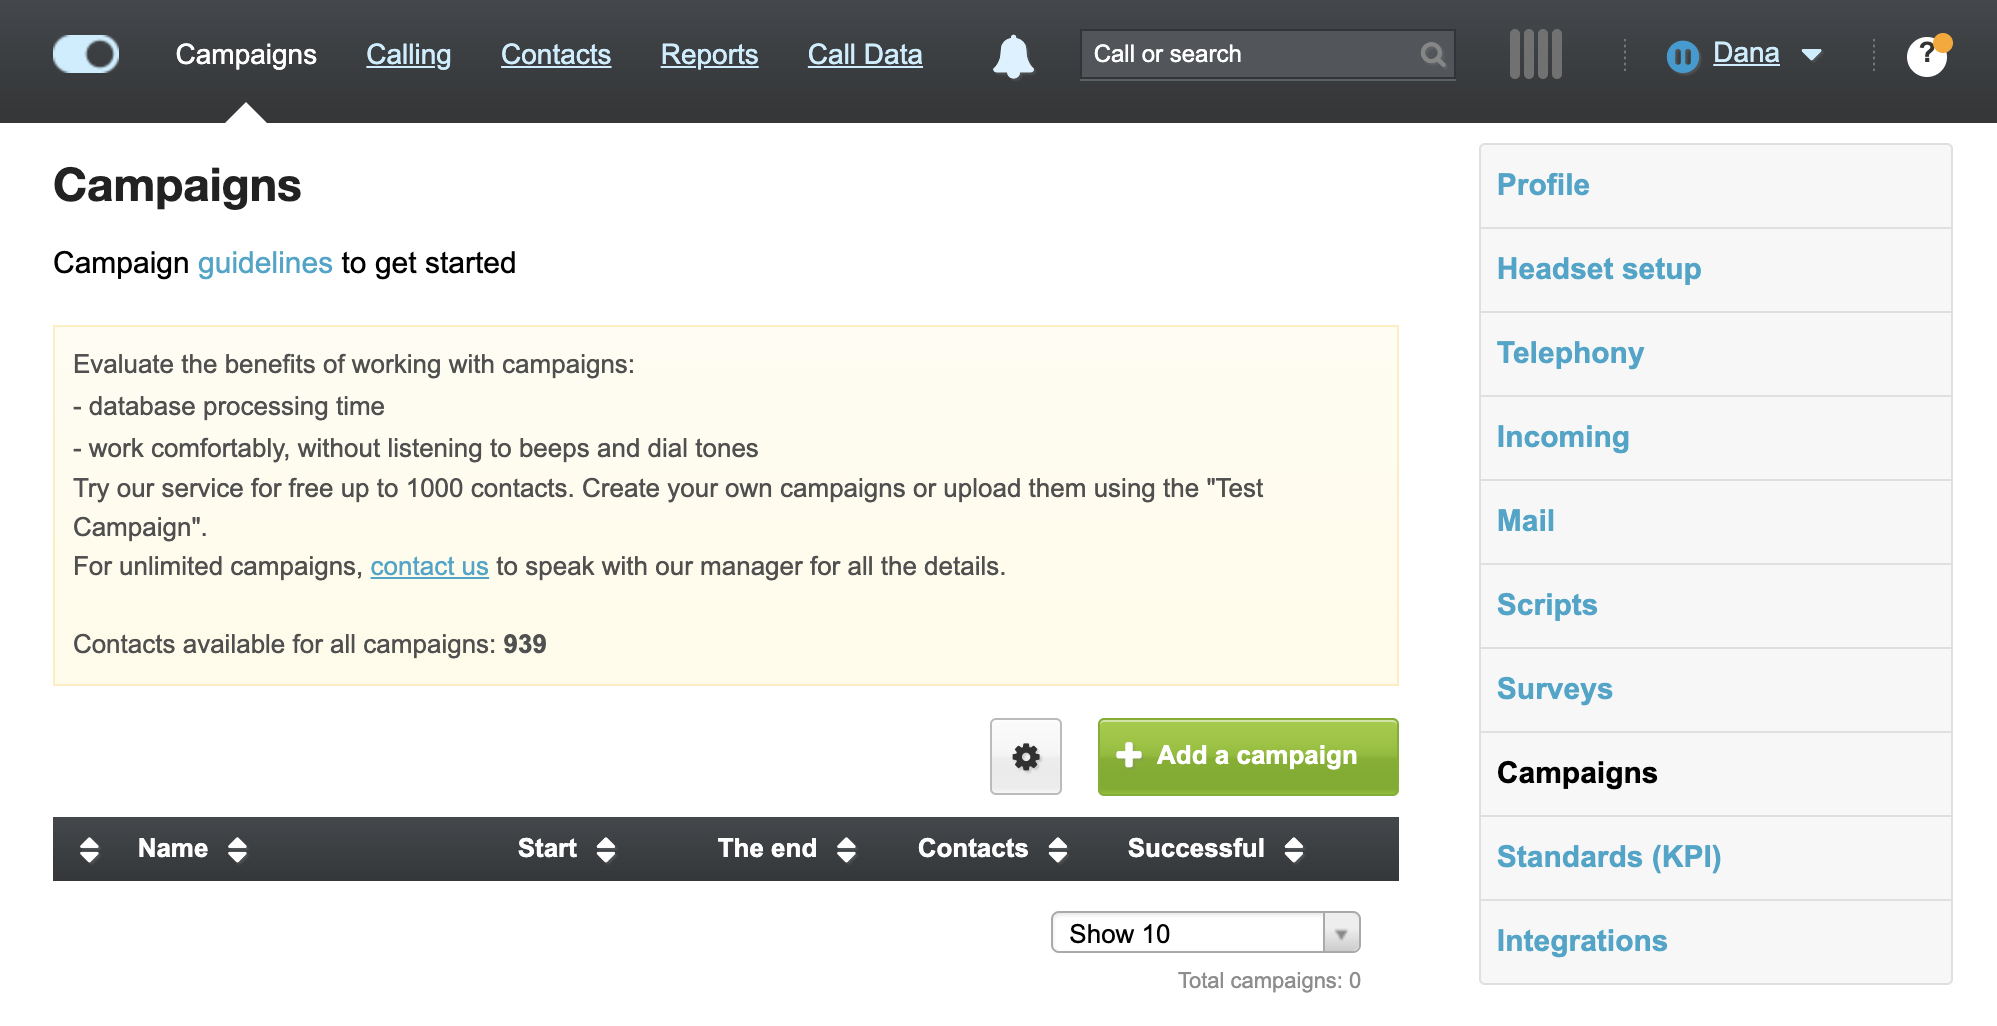
Campaigns in Selmo will save operators from beeps and missed calls. Those who pick up the phone will be connected to free operators, inactive numbers and answering machines will be filtered out, and those who do not answer will be called back.
To create a campaign, select Campaigns → Add campaign from the top menu.
Enter the name of the project, and select the calling mode and project status.
To create a campaign, select Campaigns → Add campaign from the top menu.
Enter the name of the project, and select the calling mode and project status.
Step 6
- Predictive modeThe dialer calls several numbers at once. The number that you managed to get through to is connected by Selmo to the manager. It works based on statistics, so usually, no more than 5% of calls go unanswered by the manager. The manager does not waste time on beeps, so he has more time to communicate with customers and sales.
Suitable if you have a very large database that needs to be called faster or a lot of missed calls in the database. - Progressive modeThe dialer calls one number after the end of the current call. In this mode, the manager does not lose a single client and does not waste time on unnecessary clicks and unanswered calls.
Suitable if every call and client is important to you.
Enter the number that will be displayed to the customer when calling. Each project can have its own number. If the number has not yet been confirmed in the service, then click «Confirm» and enter the code from the incoming call. If your own PBX is connected, set the number of lines indicator value at the rate of 6 lines per operator. When doing this, consider the number of lines supplied by your telephony operator and the number of projects. If you have several projects, distribute the number of lines between them.
- Dialling time to the telecom operator (5-7 seconds). At this moment, the subscriber's phone does not ring yet;
- Waiting time for the subscriber's answer. The subscriber's phone is ringing, the service is waiting for an answer. The optimal time to reach the client is 23 seconds, and then the client's phone will ring for 16-18 seconds.
- Call back not earlier - the repeated call to the client will be made not earlier than the set time. At any time according to the distribution queue.
- Call back after - a repeated call to the client will be made out of turn after a set time interval.
Select employees or groups of employees who will work on this project. Calls to them will be distributed automatically.
Select the scenario according to which customers will be called in this project. When the call is distributed, the operator will see a client card with the set scenario and the results at the end of the call.
Select the scenario according to which customers will be called in this project. When the call is distributed, the operator will see a client card with the set scenario and the results at the end of the call.
Load clients from different time zones into the project. The system will automatically determine the client's time zone by phone number and call him only at the allowed time. This allows you to exclude calls at night.
Incoming calls
To receive incoming calls in the service, you must send a request from the service.
To do this, go to Account (Username) - Settings - Incoming.
After connecting, you need to configure the reception of incoming calls in the service.
To do this, go to Account (Username) - Settings - Incoming.
After connecting, you need to configure the reception of incoming calls in the service.
Step 7
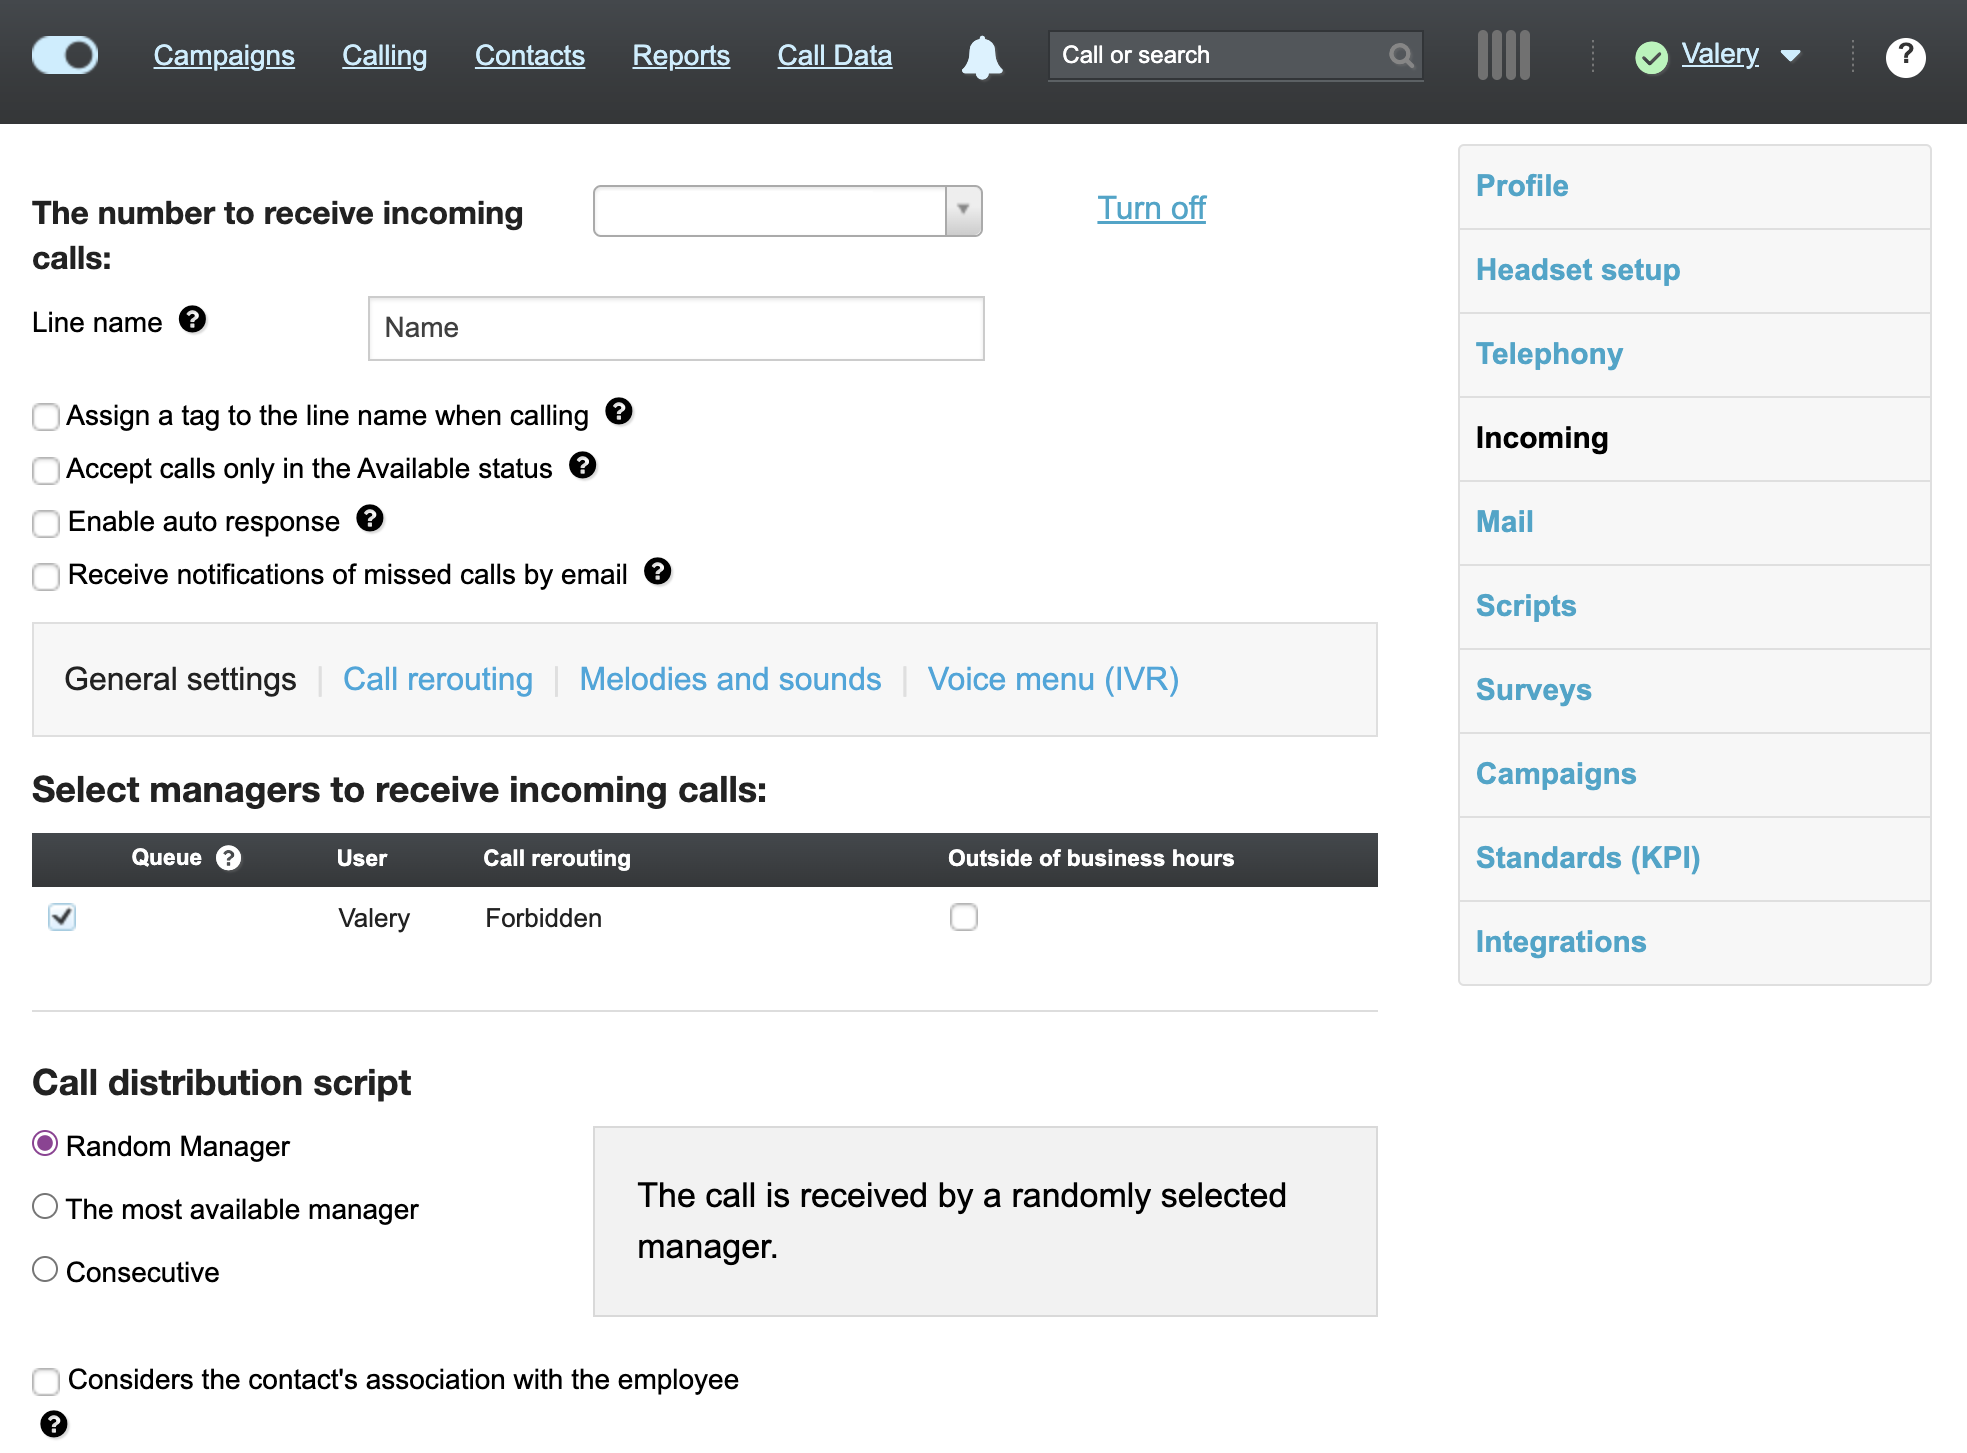
What are the options for receiving incoming calls in the service:
Enter the number that will be displayed to the customer when calling. Each project can have its own number. If the number has not yet been confirmed in the service, then click «Confirm» and enter the code from the incoming call. If your own PBX is connected, set the number of lines indicator value at the rate of 6 lines per operator. When doing this, consider the number of lines supplied by your telephony operator and the number of projects. If you have several projects, distribute the number of lines between them.
- Call back not earlier - the repeated call to the client will be made not earlier than the set time. At any time according to the distribution queue.
- Call back after - a repeated call to the client will be made out of turn after a set time interval.
Select employees or groups of employees who will work on this project. Calls to them will be distributed automatically.
Select the scenario according to which customers will be called in this project. When the call is distributed, the operator will see a client card with the set scenario and the results at the end of the call.
Select the scenario according to which customers will be called in this project. When the call is distributed, the operator will see a client card with the set scenario and the results at the end of the call.
Load clients from different time zones into the project. The system will automatically determine the client's time zone by phone number and call him only at the allowed time. This allows you to exclude calls at night.
IVR
A voice menu is a sound file played when a client calls, with the ability for the client to select a specific action: transferring the call to the desired department of the company, transferring it to a specific employee, playing information, and so on.
To configure the voice menu, go to Account (Username)—Settings—Inbox—Voice menu (IVR), and click «Create».
A form for creating the first voice menu will open on the settings page. By default, it is the main one. You can create several options for the voice menu and choose the one you want to play.
To configure the voice menu, go to Account (Username)—Settings—Inbox—Voice menu (IVR), and click «Create».
A form for creating the first voice menu will open on the settings page. By default, it is the main one. You can create several options for the voice menu and choose the one you want to play.
Step 8
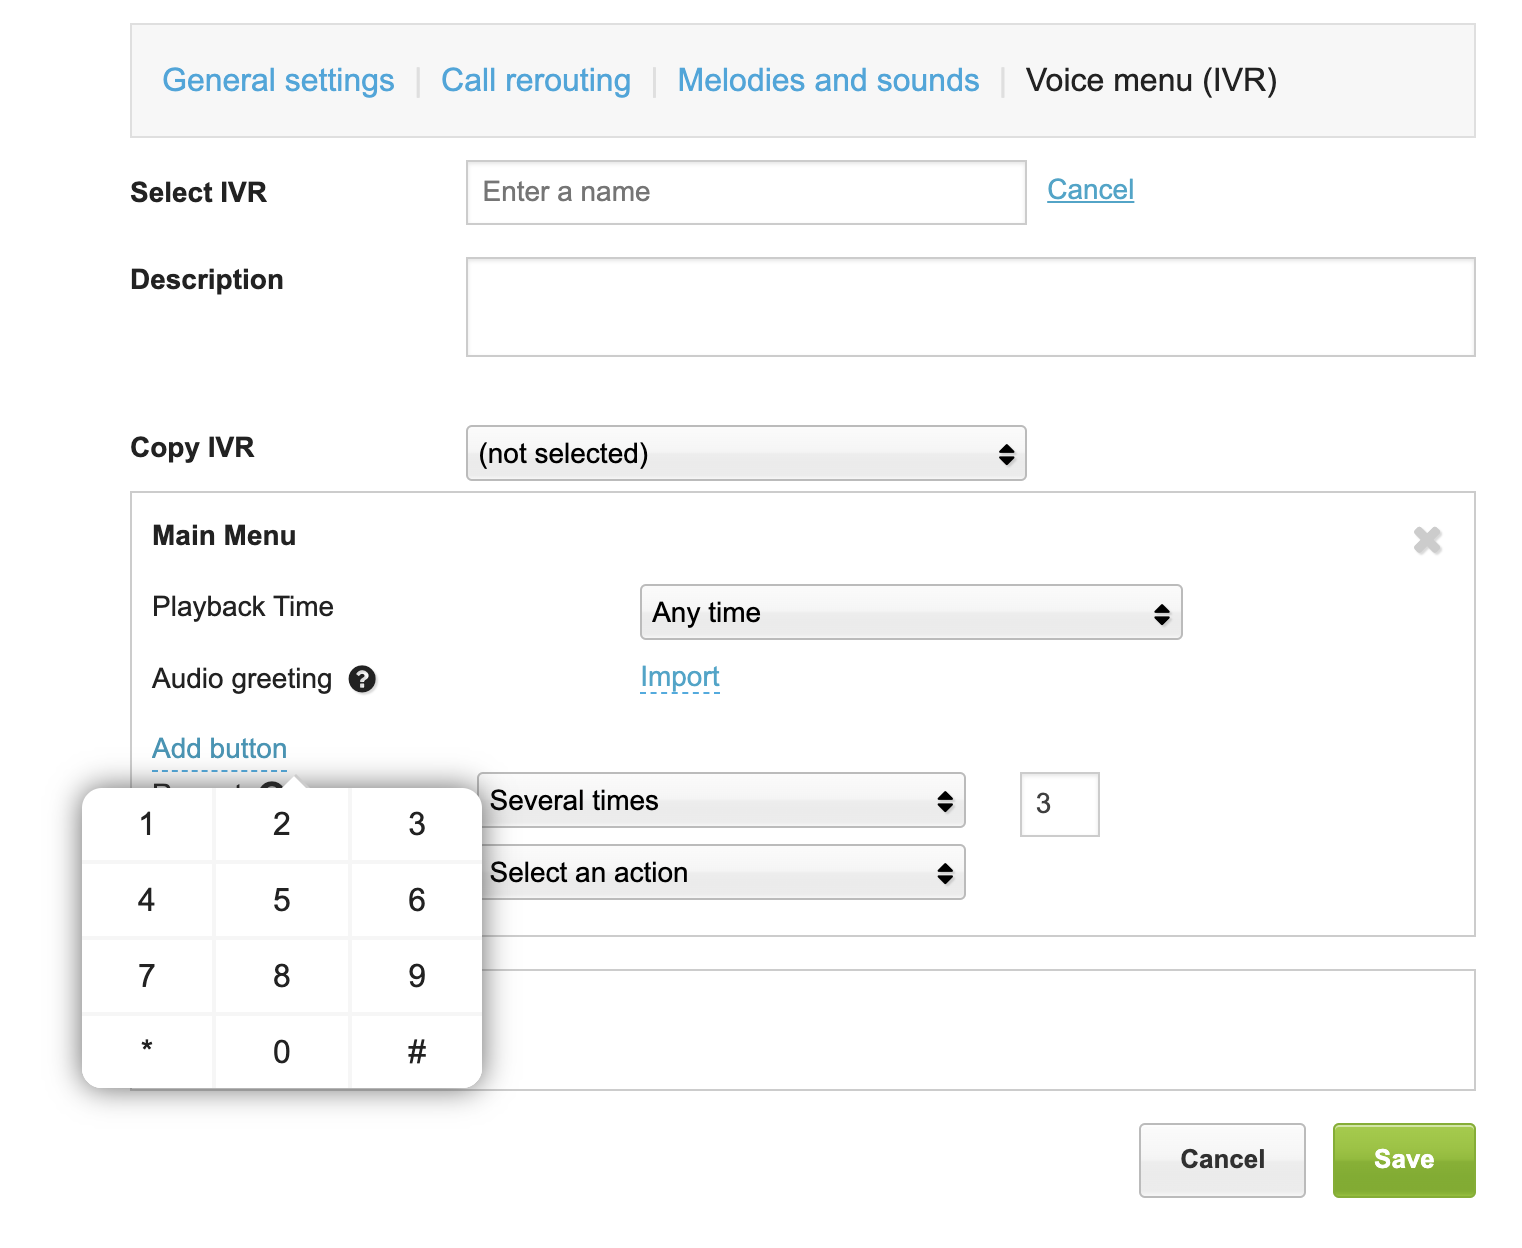
To configure the voice menu, go to Account (Username)—Settings—Inbox—Voice menu (IVR), and click «Create». Upload a voice greeting that will be played to the client when entering the menu. File size up to 10 MB, MP3, WAV, WMA format.
Use the «Add button» link to add the numbers you want and what to do when you click on them.
Use the «Add button» link to add the numbers you want and what to do when you click on them.
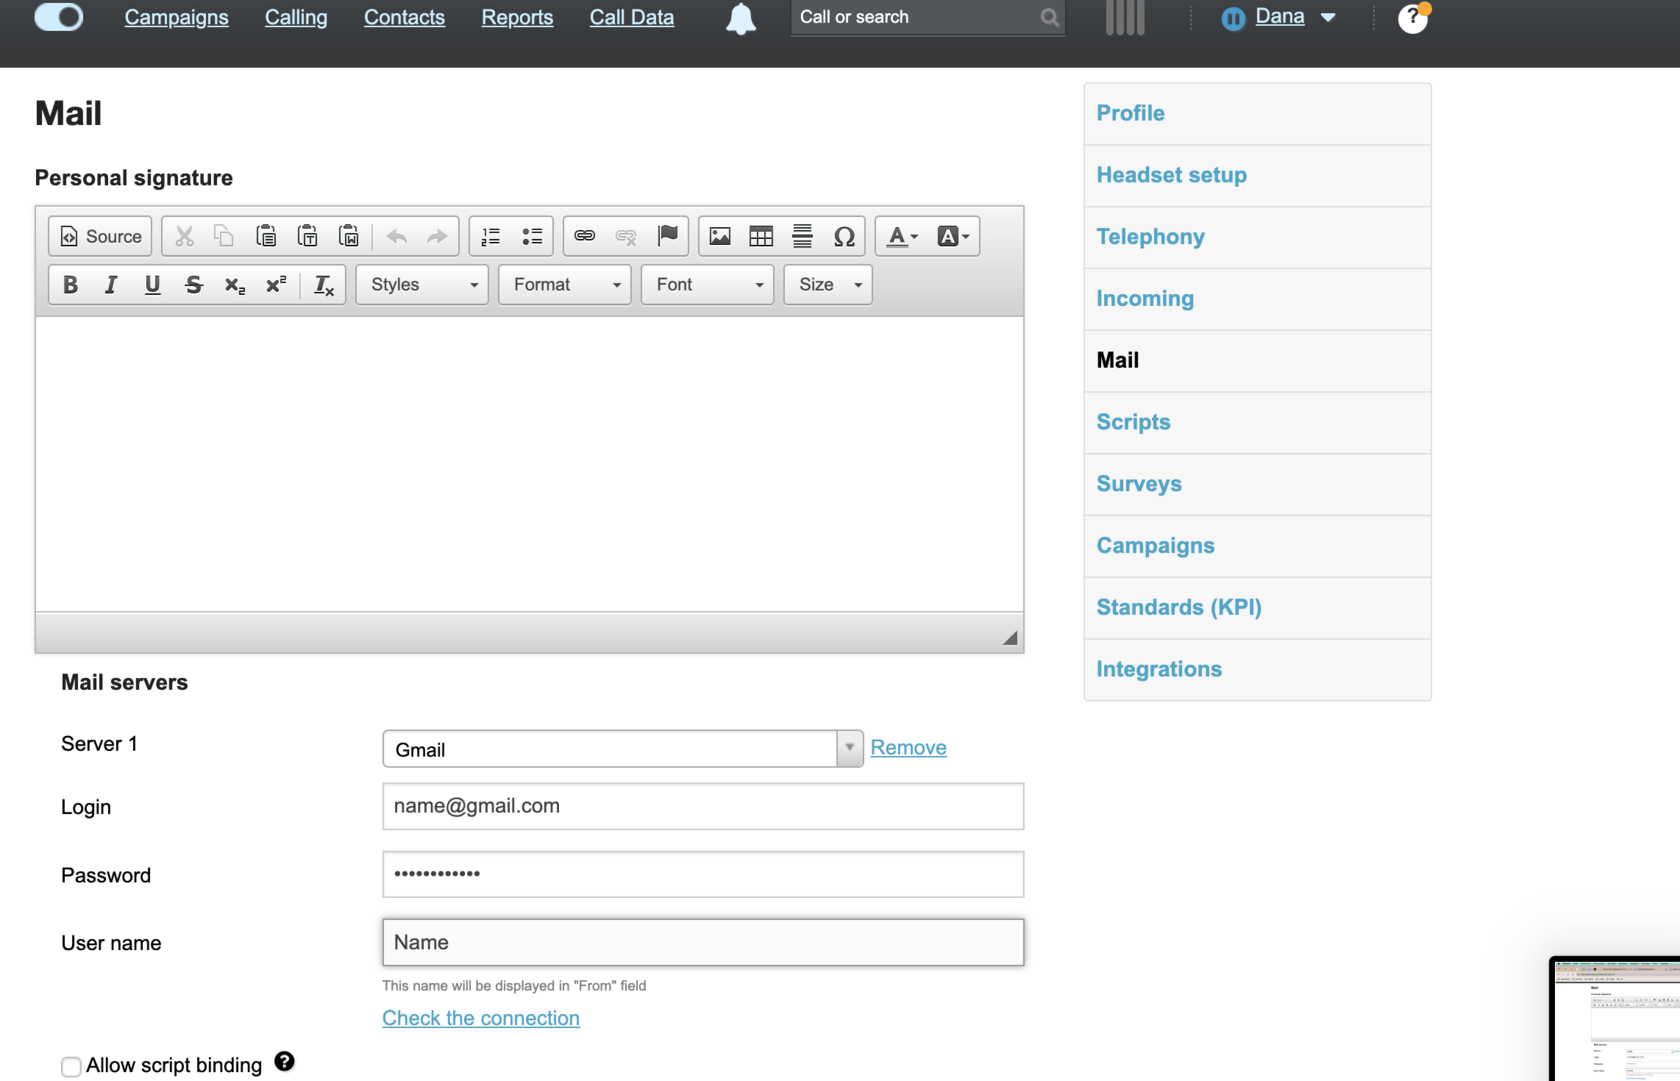
Mail Management
During a call, you can send letters to customers from the card. In order for the letter to be sent from your email address, you need to configure it. In your personal account (opens by clicking on the name in the top menu of the service), select the «Mail» section.
You can create a personal signature. This signature will be automatically inserted at the end of every email sent.
You can create a personal signature. This signature will be automatically inserted at the end of every email sent.
Step 9
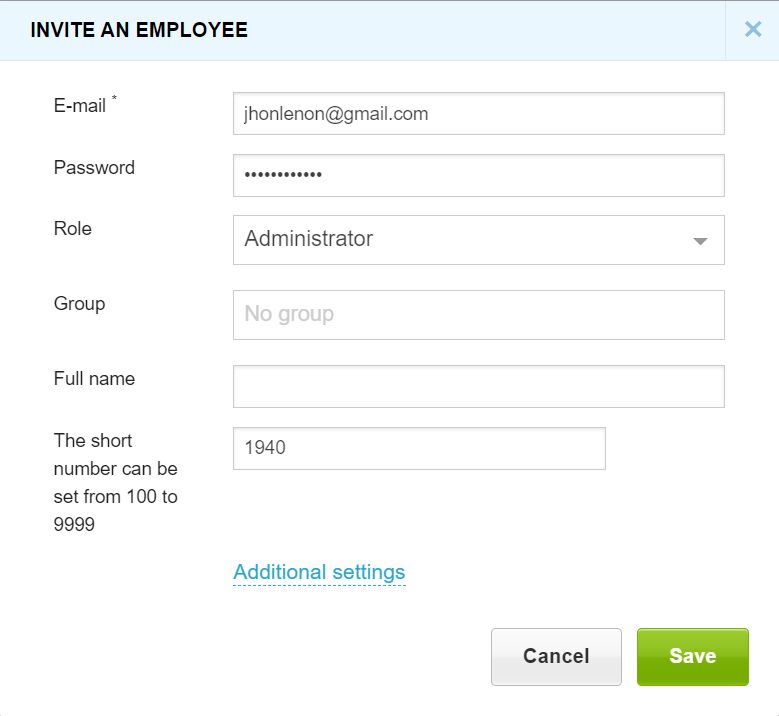
User management
- To invite your team, you need to proceed to the Team section in the Settings section. Using the “invite employees” button add your managers.
- Set the role for your managers:
- The administrator has access to all information on the account. He can delete users, delete contacts, and listen to recordings.
- The manager has access to information only on his account and he can’t delete any data.
Step 10
- After adding managers, an access link will be sent to them by email.
- On this page, you can check the status of users, block and remove managers. In order to temporarily block a manager, you must select Status and set Blocked status.
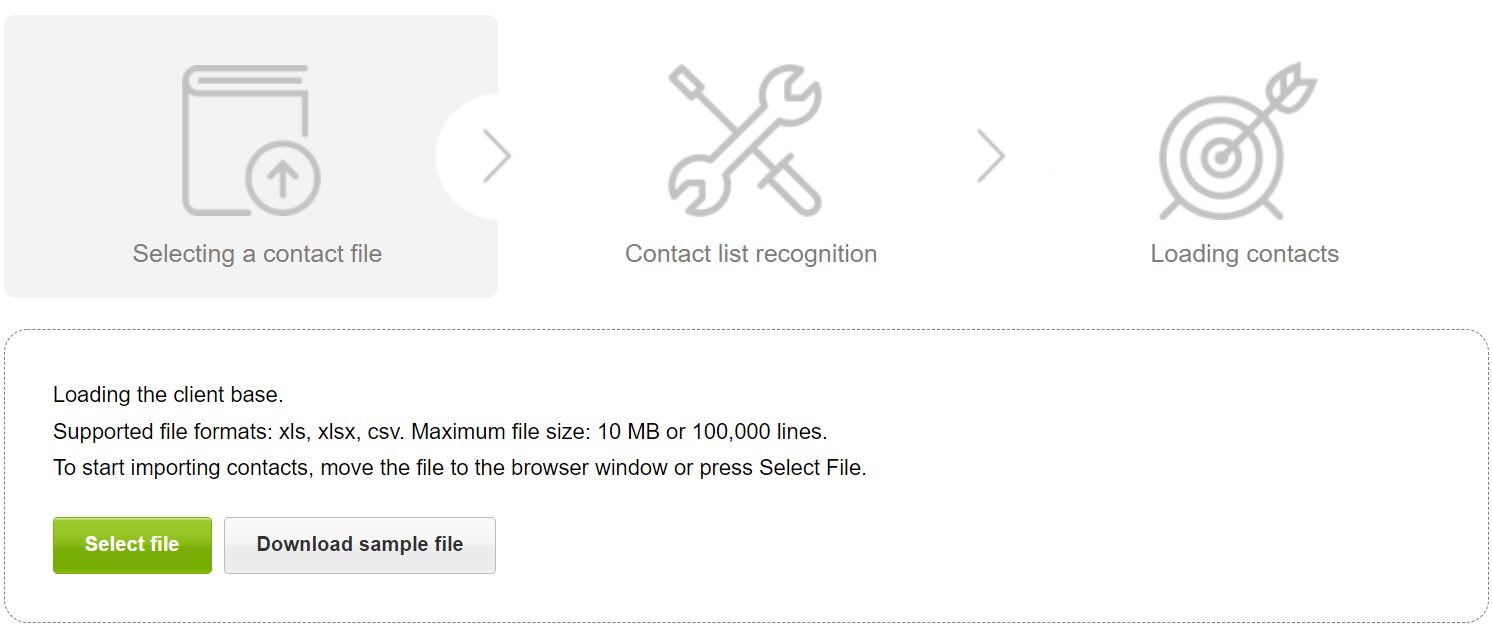
Contacts base
To start the work of the sales department, you need to distribute contacts.
- Go to the Contacts section and select the Import button.
- Select a file and wait for file identification. After successful import, just define the column names so that they are displayed correctly in the service.
- Select the manager to which you want to link contacts and add a Tag by which you can identify these contacts.
Step 11
- After the import is completed, you can go to the Contacts list to distribute the database among managers.
Scripts
After database distribution, all managers have contacts for calling and it is necessary to allocate tasks to them. You can do it easily with our Scripts feature. You need to choose Settings in your Account and select the Scripts section.
Step 12

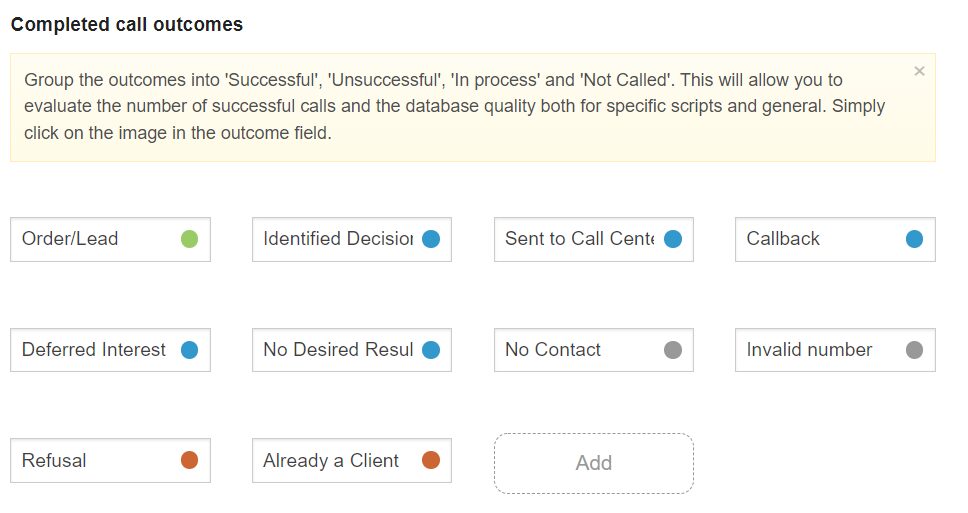
- When creating a script, you have access to a wide range of script design options. You can insert images, and emoticons, manage the font or add hyperlinks.
- For each script, you can create a call completion result. This is the Summary that each user will select when the call ends.
- Allow managers to move to the next card without selecting a result. If you uncheck the box, managers will put a summary after each call, so you will not miss a single call from the manager in the reports.
- Allow the system to automatically dial the next contact on the list.
- Link the survey to the script, but note, that you need to create it before.
Now each manager will see this script on the Calling page. It will be listed as the first call and will be displayed when making a call on the calling card.
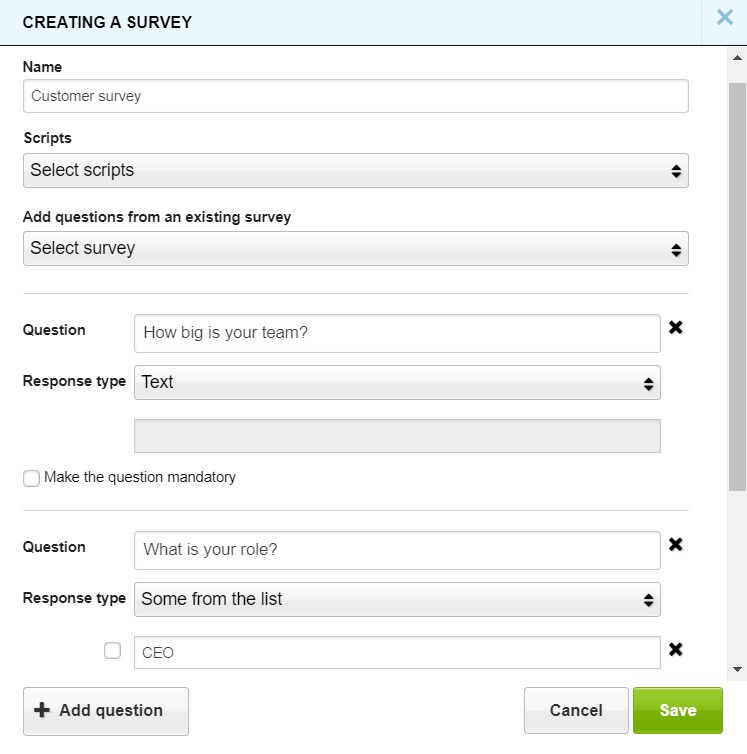
Surveys
Survey creation is important to make your calls more systematic.
- Go to the Settings section and choose the Surveys. Click the “add survey” button, specify the title, select the script to which the survey will be attached and specify the questions.
- This survey will be displayed on the calling card during the call.
Step 13
Congratulations for making it this far!
Finally, we set up an account, invited managers, replenished the balance, uploaded and transferred contacts to managers, and created scripts and surveys. Now managers can start calling, and you just have to control their work in the reports section.
As you progress in your sales efforts, you will find that automating different pieces of your sales workflow and enriching them with data allows you to outsmart the competition.
As you progress in your sales efforts, you will find that automating different pieces of your sales workflow and enriching them with data allows you to outsmart the competition.